Individual & Team Decision Matrix
|
The team decision matrix was used to evaluate different possible designs and to determine which design option is statistically the best design. The first step was to define the evaluation criteria. We decided to focus on four main areas including safeness, efficacy, affordability/aesthetics, and popularity.
|
Before moving into a team matrix, each team member completed an individual matrix so we could each record our unbiased opinions. Every team member evaluated the bear design the highest with it scoring a 8.45, 8.05, 8.30, and 7.85. After completing our team matrix, the bear design scored a 7.90.
|
Safeness: Our design is targeted towards parents and children so safety is a high priority. We decided to give the safeness category the most weight so that we can ensure a safe design is selected.
Efficacy: Efficacy was given the second most weight. In order for our product to be successful, it is important for all the features to work correctly. We want to prioritize designs that will be consumer-friendly and easy to use.
Affordability / Aesthetic: These two options were given equal weight because they will both allow the product to appeal to consumers. Keeping the product price low will allow us to easily compete with similar products. Having a visually appealing design will encourage consumers to purchase the product.
Popularity: Popularity was given the least amount of weight because while it is important for our product design to be popular, the other evaluation components are much more important for making a successful design.
The final step for our matrix was to analyze the results to form conclusions and make a final design selection. Based on the decision matrix, our team decided to go with the bear design. The detailed descriptions of our rational and conclusion can be found in the document below.
Life Cycle Assessment
|
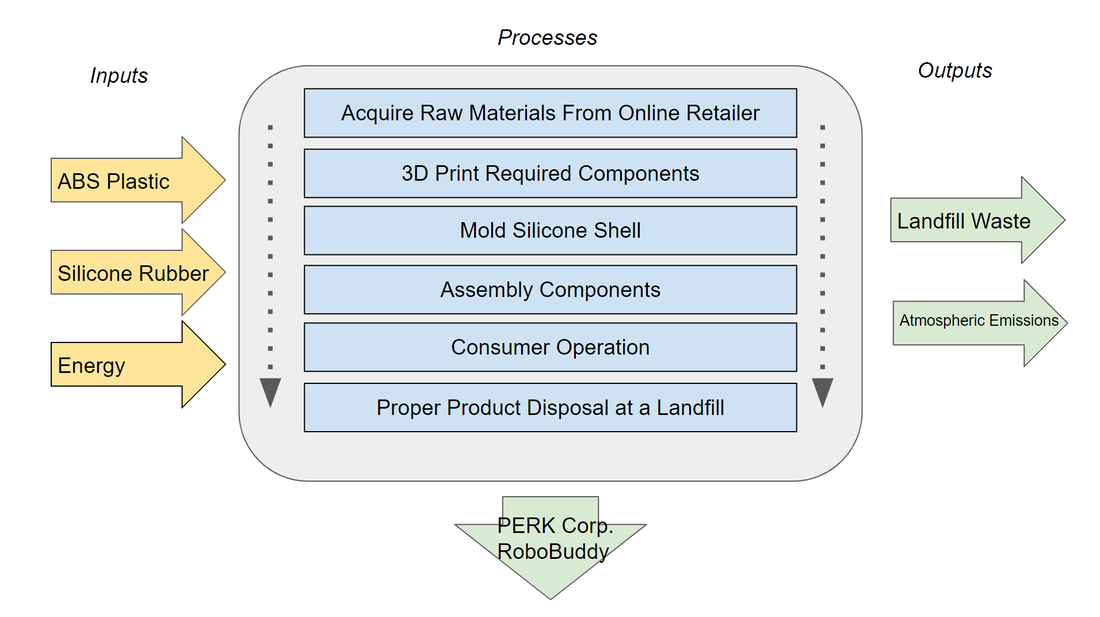
The life cycle assessment was used to look at the impacts of our product. Throughout this assessment, we looked at the inventory analysis to determine the impacts of our product. It is important to ensure that our design is environmentally sustainable so this report helped us to consider the different environmental impacts of our design. This included analyzing the raw material sourcing, manufacturing, and maintenance. We also looked at the environmental impacts of the product including the recycling possibilities and pollution effects. We also designed a LCA infographic diagram to visualize the findings from our life cycle assessment. The two main raw materials we looked at for the assessment where plastic and rubber. The outer shell and interior parts for the RoboBuddy will be designed with plastic and the exterior will be covered with a protective rubber shell. Specific details for each of these materials can be found in the document to the right. In addition to the specific details, a list of all the sources used for our research is also included in the document on the right.
|
|
Sourcing/Distribution: Product materials can all be sourced online with online retailers like Amazon. With an Amazon Prime account we can expect to get fast two day shipping for necessary product materials.
Manufacturing: The 3D plastic components will be designed in OnShape. These components will then be manufactured and printed on a 3D printer. Once the components are completed, the electronic parts will be added to the 3D printed pieces. All the components will be manually assembled to finish the RoboBuddy product.
Usage and Maintenance: The maintenance work for the RoboBuddy will be very low. The only work the consumer will need to do in order to maintain the device will be to add new AA batteries whenever the old ones run out of charge. The only pollution from the operation of the item will be the disposal of AA batteries. We can encourage the consumers to use rechargeable AA batteries which will help to offset some of the pollution. The materials that we will be using for the design all have very long life spans. The silicone shell is excellent for protection against sunlight and it is also water resistant to help preserve the product for water damage. Compared to PLA plastic, ABS plastic is also much stronger and can last a long time. This has been seen in products like LEGO bricks which are manufactured with ABS plastic.
Recycling: ABS plastic can be recycled. It has been designated the recycling code 7 which means it can be recycled to offset the carbon footprint of ABS plastic products. Silicone cannot be recycled as easily and require specialized recycling companies to deal with silicone waste. This means that silicone products will most likely end up in landfills instead of being recycled. In addition most of the electronic components inside the product cannot be recycled and the batteries cannot be recycled either. In conclusion, while the plastic is recyclable, the combination of other components in the product will most likely make it so that the RoboBuddy cannot be easily recycled.
Environmental Impacts: ABS plastic is not as environmentally friendly as PLA plastic. PLA can be plant based which makes it much more environmentally friendly. In contrast, ABS is oil based which makes it less environmentally sustainable. Despite this, ABS is much more durable and longer lasting than PLA plastic. This means that an ABS product will last longer so the consumer will not need to repurchase the product as often. This limits the amount of waste that goes into repeatedly manufacturing products that have deteriorated. When analyzing the trade offs between a more green plastic and a more durable plastic ABS is clearly the superior choice. The internal electronics of our prototype, including the batteries, will end up in landfills therefore they will not be recycled. Unfortunately, this will increase the carbon footprint of our product but it would not be possible to avoid this. We do not estimate many, if any at all, environmental impacts from the assembly of our prototype. Of course there will be some carbon emissions in the manufacturing process for each of our parts, but it is not possible to quantify these numbers as this information is not currently available to us. In the future, however, if we were to make the parts ourselves, we would be able to quantify our exact carbon output. At this time we have not yet determined the volume of plastic required to make one product. In the future we will be able to find exact numbers for the carbon emissions to produce one product when the amount of plastic needed for each unit has been determined.
3D Modeling Tutorials
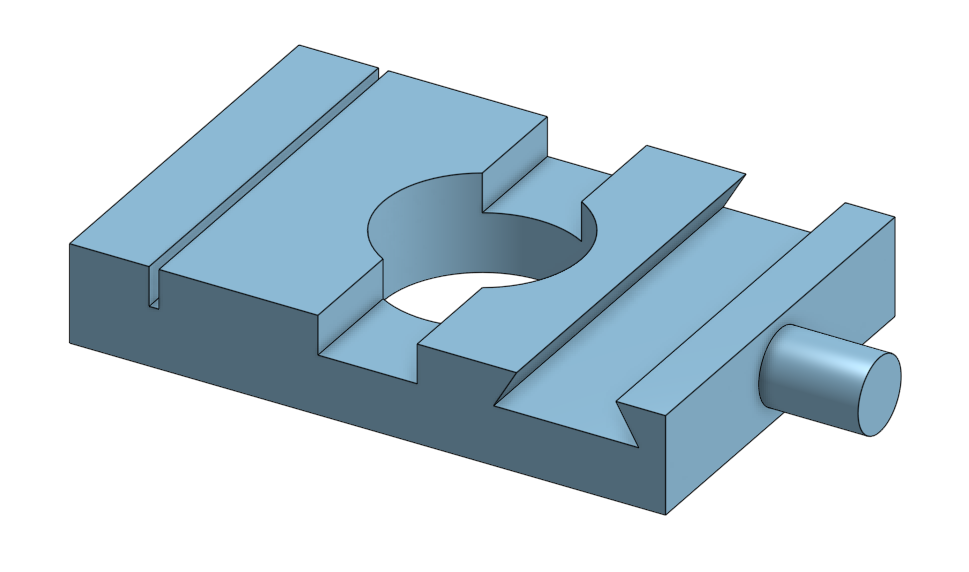
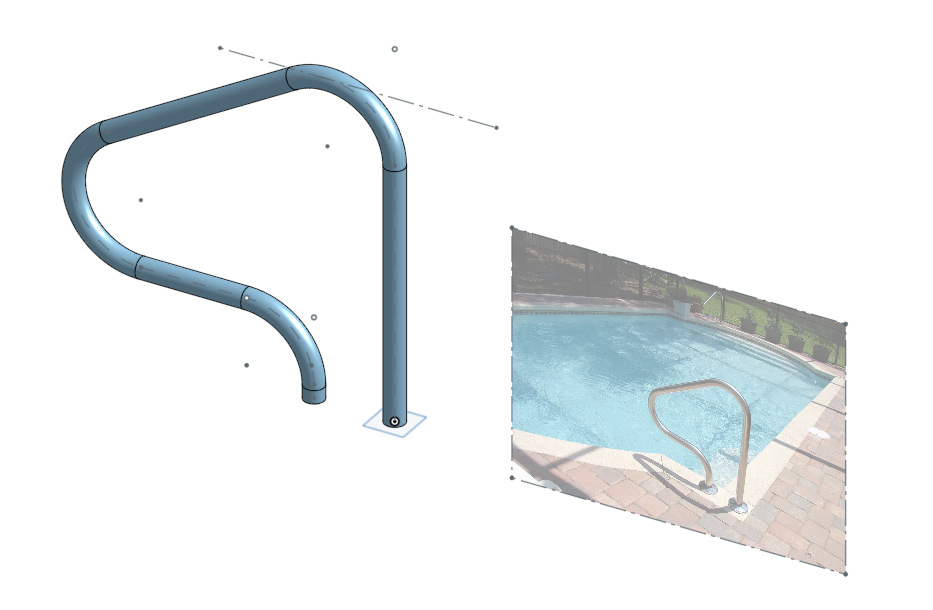
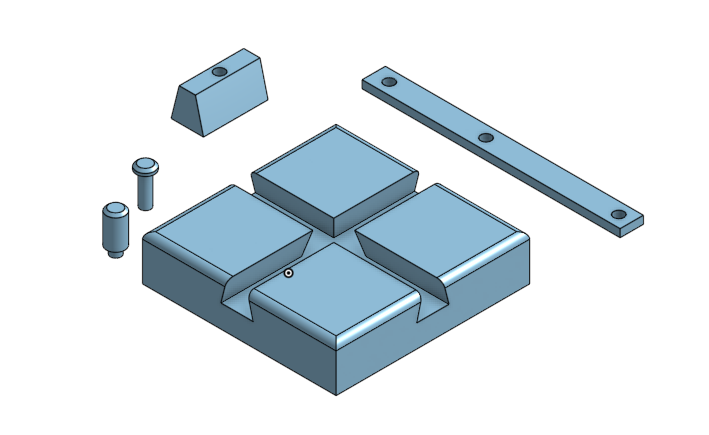
In order to gain the skills needed to make 3D models of our own project prototype we completed 3D modeling tutorials using OnShape. To start, we completed three 3D design tutorials. The first tutorial introduced sketching and extruding basic shapes. Then, it covered using the sketch and extrude tools to remove area from pre-existing shapes. Finally, it covered adding additional material to the shape using new sketch planes. The 3D shape created in the first tutorial is shown on the left. The second tutorial covered the sweep feature. To learn how to use the sweep feature, we modeled a pool railing using the sketch and sweep tools. The model designed in the second tutorial is shown in the middle below. The third tutorial covered designing multiple components that join together into one model. This tutorial involved designing all the different components that are needed to make a do nothing machine. Using the tools learned in the first two tutorials, we made five different 3D parts. The parts from the third tutorial can be seen in the right picture below.
|
|
|
Reflection
For me personally, the 3D design tutorials went well. I enjoy 3D modeling and 3D printing so it was nice to work on the tutorials and learn a new CAD software which allowed me to improve my 3D modeling abilities. I was also able to 3D print the do nothing machine after I designed it using OnShape which helped to better understand some of the virtual animations by seeing them in real life. Similarly to past design stages, the main part of my work that went poorly was time management when working on the life cycle assessment. To improve and do better in the future I can continue to work on developing better work habits to improve some of the time management issues. The last thing to improve on would be to involve our team mentors more. We haven't had many issues recently that required consulting our team mentors but it would be good for us to keep them more involved in the future. The main thing I learned throughout this design step was 3D modeling with sketching and extruding shapes. Previous programs I had used were based on combining preexisting shapes so it was interesting to learn a new method of 3D modeling. I also learned about the high level of detail that goes into making designs. I had never done a decision matrix before so it was interesting to see how you can use numbers and data to find the best solution.
